Showing posts with label Big Shot. Show all posts

Monday, May 18, 2020

Dino Days Club Card


I splurged on a light box but have been playing with it for the best results.  So far I need help!  I think that it would be good to go watch YouTube videos!  LOL!  This was a super cute idea based on a card by Stampin Pretty here.  I purposefully pulled out my retiring In Colors to make this card.

Stamps:
Dino Days (retiring)

Colors:  Pineapple Punch, Call Me Clover, Grapefruit Grove, Soft Suede (tree trunk)

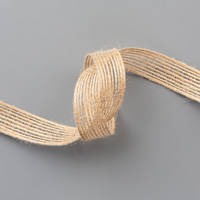
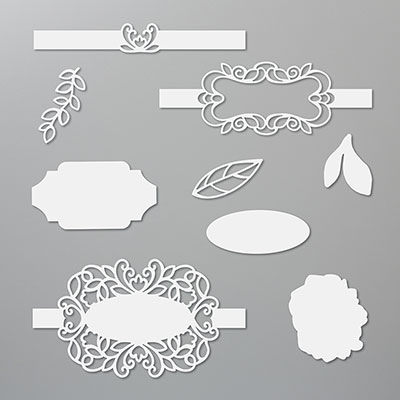
Supplies:  Big Shot, Rectangle Stitched dies (for the white background), Dino dies (to cut out the dinos), Painted Labels dies (to cut out the sentiment), Call Me Clover ribbon, dimensionals

This one was easy!
  1. Stamp the dinos and cut out with dies.
  2. Stamp the sentiment and cut out with the die.
  3. Cut out the white rectangle and stamp the palm tree.
  4. Stamp the circles on the Grapefruit CS.
  5. Assemble layers!
Happy stamping!
Stef

Thursday, November 14, 2019

Snowman Season Card


Hello!  This is a fancy fold card that is so fast and easy!  Click here for the card directions.  Click here for my card front inspiration.

Happy stamping!
Stef


Stamp Set:  Snowman Season
Colors:  Coastal Cabana, Real Red, Whisper White
Supplies:  Big Shot, Stitched Shapes, Let It Snow Embellishments, Momento Ink, Wink of Stella
Instructions:
·       The white base is 4 ¼ x 8 ½ and scored at 5 ½.  The Coastal card is 3 ¼ x 9 and scored in half.
·       Nest the two ovals on the Coastal CS to get a frame. 
·       Stamp the snowman in Momento Ink and cut out with the larger oval.  Add Wink of Stella and embellishments from the kit.
·       Stamp a sentiment in Momento ink on the remaining Coastal oval.
·       Adhere the back of the small Coastal card so that it is centered on the white card base.
·       Attach the front card layers.
·       Use dimensionals to attach the snowman oval and again for the Coastal frame.

Wednesday, March 6, 2019

Happy snow week!

In honor of our late spring here is a snowman card for you!  It was in my stack of older cards that I had not posted...I think!  LOL!  I used markers and the Wink of Stella on the snowman image. 

Happy stamping!
Stef

Wednesday, October 17, 2018

Copper Leaf card

Hello!  Here is the fall card that I played with today.  Enjoy!  It is my version of the card in the Fall Catalog.

Happy Stamping,
Stef

Instructions: 
·       On the vanilla square paint copper paint.  To dry use the heat tool. When dry, stamp the details in Blackberry Bliss.
·       Crumple up the vanilla rectangle and spread flat.  Rough up the edges.  Shake the copper paint bottle and then use the lid to get paint on the brush.  Pounce the brush on the vanilla CS.
·       Stamp the pine needles in Mossy Meadow ink on the card base.
·       Adhere the vanilla rectangle to the card base with dimensionals. 
·       Cut out two detailed Blackberry Bliss leaves and one Cajun Craze leaf shape (no details).
·       Cut out the leaf shape on the copper painted CS.
·       Mount the leaves onto the card front.

Friday, March 30, 2018

Blossoming Basket Bundle card for Club

Hello!  Today is club day and I am so excited!  Thursday was a crazy, crazy day but we are all done with standardized testing for the year and everyone is getting over the sinus issues.  Phew!

Can I just say that this was a super fun and easy card?  On a whim I pulled out the epoxy dots and colored them with the green Blends marker.  Very cool!

Happy stamping!
Stef

Tuesday, October 17, 2017

Stamp Camp Project #1

I discovered that it is so much easier to adhere the gold paper to the backs of the windows BEFORE adhering the village to the card front!  LOL!

Stamp camp will be Saturday, November 11 and will cost $55.  Registration is due by October 31 and will include lunch, the Hearts Come Home bundle, instructions, and supplies for four cards.  Love this set!  Click here to see the bundle.

Update:  I plan to redo this card and have longer white pieces below my village scenes.  Overnight the card warped from the drying embossing paste.  I just think that it would look nicer with "deeper" village scenes in white.  I used shimmery white CS but will probably switch to Whisper White.


Happy stamping!
Stef

Wednesday, August 23, 2017

You Make Me Smile Card for Club

Good morning!  Once again I am up early to work on my club projects and blog.  My inspiration card is here but I forgot to order the matching DSP so I had to improvise.  Tomorrow I am hoping to bring in the embossing paste so that should be super fun!

Happy Stamping!  Stef


You Make Me Smile Card
Stamps:  Colorful Seasons
Colors:  Berry Burst, Chocolate Chip, Powder Pink, Sweet Sugarplum, and Whisper White
Supplies:  Big Shot, Seasonal Layers framelits, Pearls, clear block (background), doily, adhesive
Instructions: 
·         Starting with the Powder Pink, ink up a clear block and stamp on white CS.  Clean the block between colors. Re-ink in the Sugarplum ink and stamp.  Clean.  Re-ink in the Berry ink and stamp.  Clean.
·         The framelits have three detailed flowers; use one framelit for each pink and cut out a total of five flowers.
·         Stamp the sentiment and then the branches on the White CS.  Adhere the flowers and then add pearls.
·         Put adhesive on the back of the White CS and mount the doily half on back.  Trim off the excess.
·         Assemble the card.


Thursday, January 26, 2017

Club Project #2 Sending Love card

Hello Ladies!  This was a fun project and I modified the card I saw on splitcoaststampers here

For my next card I think that I will trim down the fun foam just a wee bit because you can see a peek of the foam color underneath the frame.  Also, if you can find the fun foam that is peel and stick it will save you a step. 

Update on 1/27/17:  I am posting instructions and a link to the video tutorial that I watched.   When I get a few minutes I will try to update the instructions with photos for my visual friends.
Click here for the video.
 
Happy stamping!
Stef

Stamps:  Sending Love

Colors:  Blushing Bride, Real Red, and Whisper White

Supplies:
Big Shot
Framielit dies, Layering squares
Fun Foam (Walmart or Hobby Lobby)
Dimensionals
Metallic ribbon (free in the Sale-a-bration catalog with a $50 purchase
Sending Love DSP
Punch, Decorative Label and 1 3/4" circle
Embellishments, paper clips, metallic sequins, and red glitter
Window sheets

Instructions:
  1. Use washi tape (or painters tape) to "join" two layering squares together in the Big Shot.   With both squares "joined" cut out the card front being careful to center for a nice opening.
  2. While your squares are still "joined" cut out the fun foam and Blushing Bride frames.  Some of my ladies used the Card front frame instead of the Blushing Bride frame...looked even better!
  3. Attach sticky strip to the foam frame and then trim a bit off of the foam/tape frame.  The foam seems to stretch when it is cut out and this will keep edges from peeking out and make sure that your sticky strip is not too wide. Be sure to cover all of the frame with adhesive or it will "leak".
  4. Adhere the card front to the card and stamp a sentiment in the "hole".  For my card demo I had attached a bit of DSP in the hole but it kept my goodies from shaking nicely; I would recommend not layering in the "hole".
  5. Adhere your fun foam frame inside of the "hole" over your sentiment.
  6. Put your shaker goodies inside of the "hole".
  7. Remove the interior square from the joined squares and cut out a window sheet the size of the largest square.  You might need to trim a wee bit off of the edges.
  8. Use lots of sticky strip on the foam frame to seal the goodies and then adhere the window sheet.
  9. Adhere the Blushing Bride or DSP frame on top to hide the foam frame.
  10. Embellish and stamp your card.

Wednesday, May 27, 2015

Double Twist Easel Card and Weekly Deals

This month I am opting to pull out the retiring colors for one more farewell appearance.  Sniff!  I LOVE the Love is Kindness stamp in the Occasions catalog but kept procrastinating.  Hope that my project inspires you to pull out your stamping goodies!

Stamp:
Love is Kindness

Colors:
Strawberry Slush, Baked Brown Sugar, and Pistachio Pudding

Supplies:
Big Shot
Ovals, framelits
Sponges
Memento ink pad, Black
Stretch Ruffle ribbon, Brown Sugar
Stampin' Markers, 2013-2015
Irresistibly Yours Designer Series paper (or any white DSP that is embossed)
Dimensionals

 Weekly Deals until June 1 2015